- Lawn Turf
- Paving & Stone
Get In Touch With Our Experts Today!
Give us a Call! - Composite Decking
- Soil
- Bark
- Dressing
- Artificial
- Timber
- Seed & Fertiliser
Sign up to get our latest news and blog posts in your inbox
October 28, 2025 Cobble SettsLimestoneNatural StonePavingPorelainSandstoneStone
When it comes to hard landscaping, there are a few materials that can elevate and transform an outdoor space. But then came along stone paving! Stone and paving offer a stunning and durable alternative for those who avoid a natural turf finish.
At GDT&S, we’ve helped countless homeowners and landscaping professionals choose and install the right stone surfaces for their domestic and commercial projects. So, we’ve decided to pull our expertise into one ultimate guide – this one! Providing pros and cons, stone recommendations and step-by-step installation guides to get the most from your paving project.
Paving refers to the installation of stone or brick materials as a ground cover. Various types of stone can be used as paving, including limestone, sandstone, cobbles, and granite, so there’s a style of stone to suit every garden design! The most common places where paving is used are:
As a hard landscaping material, paving offers extremely durable, cost-effective, and long-lasting solutions for landscaping. They also give you guaranteed longevity, aesthetic appeal and versatility. So, it’s obvious why paving is a popular choice! The right stone paving can comfortably:
Before ordering your premium paving slabs or diving into how to install paving, let’s first look at the paving options available and which one works best for you.
Pros:
Cons:
Where to install natural stone:
Pros:
Cons:
Where to install porcelain paving:
For more insights into porcelain paving, head to our blog on the Benefits of Porcelain Paving Slabs. You can also read our guide on How to lay Porcelain Paving.
Pros:
Cons:
Where to install cobbled setts:
For detailed step-by-step instructions on installing cobble setts, head to our How to Install Cobble Setts guide.
Let’s break down the different types of paving and the best steps to lay your paving material effectively. No matter which type of paving you’re installing, the first step is always the same. And it’s the most important step…preparation!
Mark out the area you want to pave. Use string lines and pegs to mark the specific space. Remember to include a gradual slope away from structures or properties to aid adequate drainage.
Remove any turf, topsoil, vegetation or existing stone from the area you’ve marked out. When digging, consider the depth of your slabs plus 100mm of crushed stone for the subbase, and 20 to 30mm for a bedding layer.
To give your pavers the best chance, reinforce their foundations with a robust edge. Place bricks or concrete slabs around the edge of the area you’re excavating. This will create a frame for your pavers and help prevent them from shifting.
Type 1 MOT or crushed stone make for a sturdy and adequate subbase for paving. Lay approximately 100mm for patios and walkways. Driveways require a little more at 150mm. Level the crushed stone and compact it into place to create a solid and even surface.
This is also referred to as the bedding layer. This is when you apply a layer of sharp sand to help aid drainage and reinforce your paving’s foundation. As a general rule, add 30-50mm when using natural stone or cobbles. A thinner base of 20-30mm is suitable for porcelain.
Paving slabs can be heavy! Be careful when moving and laying down each one. Remember to wear protective clothing such as steel-toe-capped boots, gloves and knee pads. You can also speak with GDT&S to arrange for your paving slabs to be delivered as close as possible to minimise handling of each slab.
Choose a corner to lay your first slab. If you’re following a pattern, have that to hand. Once it’s laid, tap the slab into place with a rubber mallet and use a spirit level to ensure consistency as you go. If any slabs appear uneven, carefully lift and adjust the sand until they sit level. Repeat this process with your remaining slabs, using spaces to leave a 5-10mm joint between each slab. Once the slabs are in place, use a plate vibrator on paving blocks to help compress them into place.
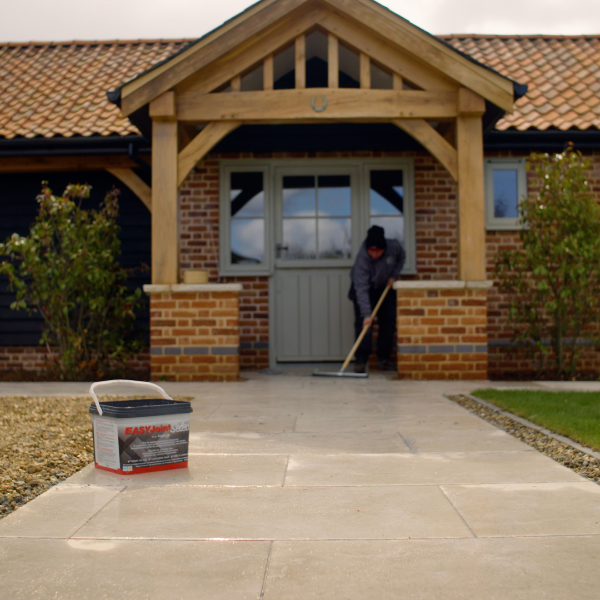
Once your paving slabs are in place, it’s time to joint them! Paving grout, such as our Azpect EasyJoint range, helps strengthen paving slabs and prevent movement over time. It also suppresses weed growth and provides a smart, professional finish. Simply mix the EasyJoint with water and sweep it into place.
Porous pavers, such as natural stone and concrete, naturally absorb water. Although this aids in water drainage and prevents surface water, over time, it can affect the appearance and integrity of the stone. This is when a stone sealant should be used. Products like Azpect EASYSeal help protect and preserve your paving installation.
Wait until your paving is fully dry, then spray the sealant evenly across the surface of your pavers. Apply generously and allow to dry before applying a second coat (if needed). It’ll need about 8 hours to fully cure. You can then have peace of mind that your natural stone pavers are ready to withstand whatever comes their way!
You can install paving any time of the year! If the ground is frozen or waterlogged, we suggest delaying installation, as it’ll make the work harder for you.
Late winter and early spring are a great time – you’re already planning your spring garden, and you can get your paving in place before nature wakes up. The ground tends to be more malleable at this point, as well as more stable after wet winters.
You want to avoid heavy downpours so your paving grout can dry and cure thoroughly. Keep an eye on the weather forecast and pick a dry day. If it does rain, cover your paving to protect it.
One of the main advantages of stone is its minimal maintenance! However, there are a few things you can incorporate into your garden routine to help them look and perform at their peak.
Done right, paving can provide a beautiful, durable outdoor surface that elevates your garden for decades! By choosing the right stone for the job and following the correct installation process, you can ensure longevity and visual impact for your clients or your own garden.
If you have a project in mind, whether a patio, driveway or roof terrace, get in touch for our expert advice. Our team can help you pick the best type of stone and jointing grout for optimal results! You can also visit our stone display in St Alban and chat with our stone experts there.
CALL US NOW ON 01234 818 253