- Lawn Turf
- Paving & Stone
Get In Touch With Our Experts Today!
Give us a Call! - Composite Decking
- Soil
- Bark
- Dressing
- Artificial
- Timber
- Seed & Fertiliser

Sign up to get our latest news and blog posts in your inbox
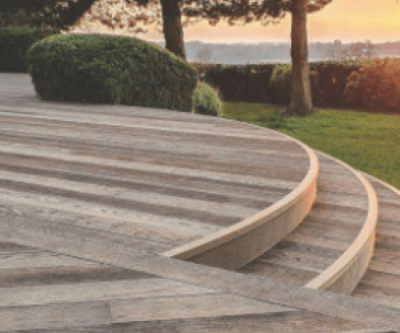
Decking is one of the most popular ways to dramatically transform your outdoor space. Millboard composite decking takes your landscaping one step further. Designed to replicate the natural characteristics and appearance of real timber, Millboard offers durable, stunning aesthetics without the implications of natural wood.
Recognised as a worthwhile and guaranteed return on investment, Millboard delivers long-lasting and premium results to customers. But it all starts with the right installation and correct aftercare. As exclusive suppliers of Millboard, we’ve worked with the experts to provide a step-by-step guide on installing your Millboard decking.
Once your Millboard decking boards have been delivered, we recommend storing them on a flat surface. If you have the space, separate the boards; if you have to stack them, ensure they’re face-to-face and not back-to-back. When moving the boards, make sure you lift them rather than drag them, as dragging can potentially scratch and damage the surface.
Before installing your composite decking, we strongly recommend laying out your boards to check for variations in tone, pattern, and size. These should be minimal, but as Millboard is mirroring a natural product, slight variations are expected – it adds to its charm! However, anything you’re concerned about should be flagged at this time. Laying your boards out also allows them to adjust to the climate where they’ll be installed.
At this point, you will have built your Millboard subframe and be ready to attach your beautiful Millboard decking. Whether you’ve opted for stunning Enhanced Grain, classic Lasta-Grip, or sleek Slim Boards, the same installation process applies.
With your subframe in place, measure the number of boards you’ll need for each row and whether any boards require cutting. An 800mm board must sit across at least three joists for adequate weight bearing.
Start with the first row of boards and maintain a 10mm gap between them and any buildings to allow for adequate drainage. As you fix each row, keep a 4mm space between each board and a 1mm gap between butt joints. For accurate spacing, use the Millboards spacers.
If any boards need to be cut, this can be easily achieved with standard wood-cutting tools. A carbon-tipped saw blade is recommended for a clean cut. When cutting, be sure to wear appropriate safety gear, including a mask, goggles, gloves, etc.
The beauty of Millboard is that no pre-drilling or countersinking is required! The screws neatly disappear into the board with invisible fixings. Start by coating the provided Durafix screws with a silicon spray to create a smoother entry. You can use a standard driver to fix your boards, but we recommend using the drill bit included. Failure to use the provided screws and drill bit can impact your warranty and your decking’s appearance.
Top tip: Avoid using an impact driver as this can break the drive bit and screw head.
Use a string line to check the position of your first board. Once it’s in place, apply pressure to the board and push firmly on the screw with your drill to insert your first fixing at the end of your board. Push the screw 5mm below the Lastane® surface and watch as the Lastane® flexes over the screw head to conceal it. Fix the middle of the board next before fixing the remaining screws to the joists.
When a board crosses a joist, you’ll need two fixings per board and three fixings at the end of each board. The fixings at the end should be inserted at an angle and positioned 20-25mm from the end and 20mm from the side of the board.
As your boards intend to replicate natural timber, there may be slight variations in width and thickness. This can be easily resolved with packers, which can be placed between two boards to create an even surface.
Top tip: Leave fixing boards at butt joints until both boards are together and any packers required have been added.
For a flawless finish, always use Millboard’s purpose-made edging, designed to fit perfectly with its decking. Again, if boards need cutting to size, a standard wood-cutting tool will work. Be sure to paint raw edges with the Millboard’s touching-up paint before attaching the final pieces.
When fixing your fascia boards and edging, use the provided Durafix screws and drill bit. Start at the end of the board with the double fixing point to secure each piece to the subframe. Then, move along the board, adding double fixings every 200-300mm.
When edging or fascia boards meet at the top of your deck, cut each one with a 20-degree cutback. This will allow them to slide together before being fixed to the subframe. No glue is required.
Top Tip: Paint the cut edge before securing it!
Because of the differing grain patterns, it’s best to cut through the centre of the board when cutting boards for a corner. To create your corner edge, you can use glue to secure the two pieces together. We recommend wood glue on the core of the board and superglue around the Lastane® edge. You can then push the two pieces together for a secure hold.
If there’s any mess after installation, be sure to sweep it away. For any marks on the surface of your decking, clean them straightaway using warm, soapy water and a soft brush. If further work is being done, cover your decking to protect it from paint or building dirt, dust, and debris.
Maintaining your Millboard decking couldn’t be easier. That’s why it’s a popular choice for landscapers and their clients. The truth is, it requires very little maintenance! The Lastane® surface of this composite decking is scratch-free, splinter-free, moisture-resistant, and contains UV stabilisers which prevent colour fading.
Unlike real wood, which regularly needs to be treated, you can leave your Millboard decking to do what it does best — look incredible! If there are any stains, wash them with soapy water and sweep away fallen debris to keep your decking surface clear and looking great.
As proud suppliers of Millboard, our team knows all the ins and outs of composite decking. Whether you have a query about ordering, delivery, installation, or maintenance, please give us a call, and our team will be happy to help!
Landscapers choosing Millboard for their landscaping projects should be sure to check out our Trade Account for exclusive benefits.
What is Millboard Composite Decking?
CALL US NOW ON 01234 818 253